Sunday, May 24, 2009

Update

Its been a while since my last post so I thought I would update. We did the install on the roof of Gospel Press on May 5th. The Installation consisted of two locations on the roof due to its size. At the first location we installed a 12dBi 2.4GHz Comet Omni, a Hyperlink Tech 12dBi 5.8GHz Backfire, a 9dBi Omni, and a Valemount War4 with 3 CM9's and a ENGENIUS EMP-8602+S.


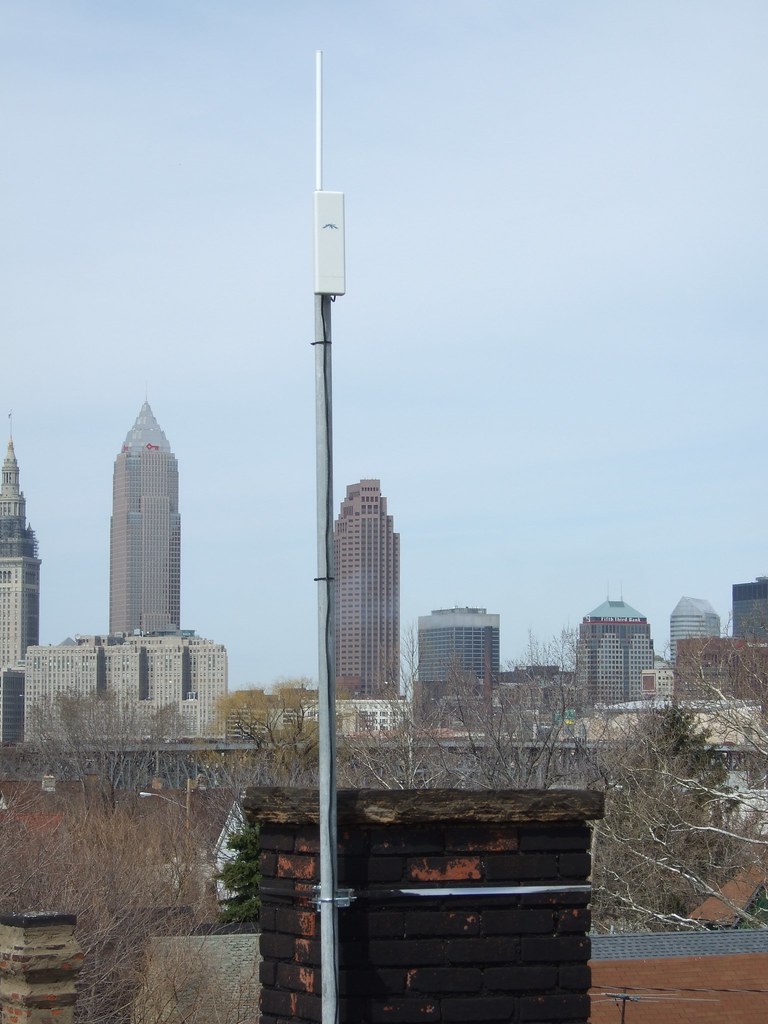
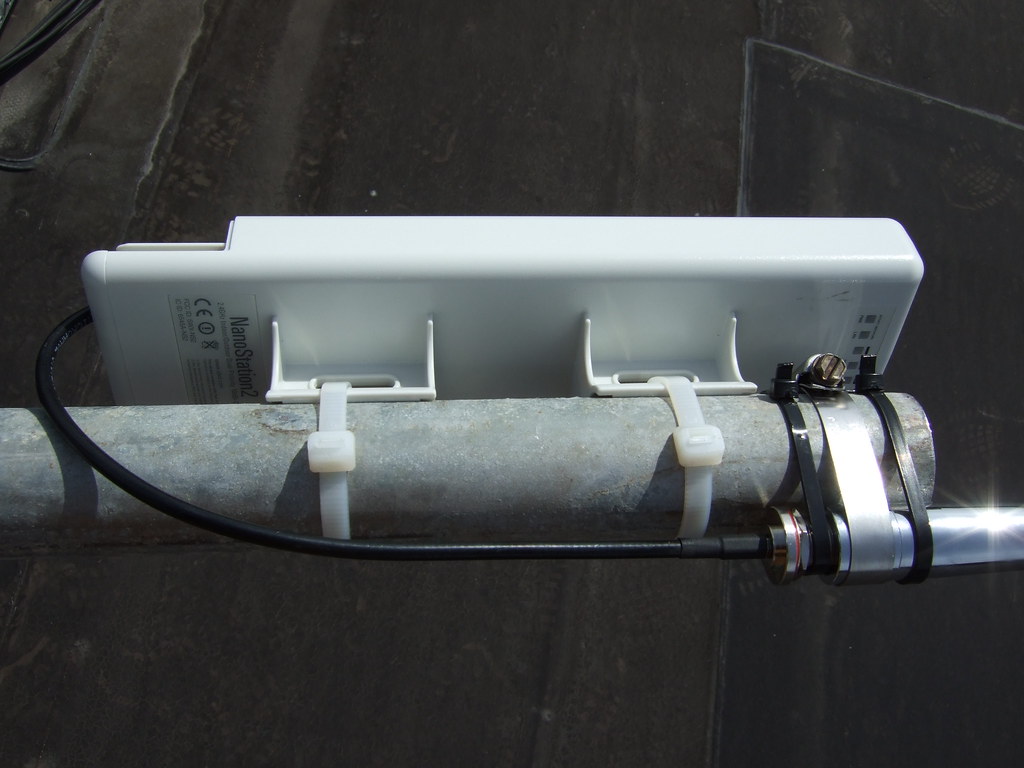
At the other location we installed a NanoStation 2 with OpenWRT running as a Ad-hoc node to tie TWSC02 to the rest of the network.


I am currently having issues with the NS2 staying online. I am not sure as to the problem, possibly due to the building still being built and the power is shut off to it frequently. I Swapped it out with a different one last week but, the problem still exists.

Friday, April 17, 2009

New Install Site

This past Monday I toured a New Site for installation of wireless hardware. This site is a key piece in the network design as it links several area's together. The building is a old book press that is being transformed into and apartment complex. This site has by far had the nicest route to the roof. The building is so large that we are placing equipment in two different locations on the roof.


This is a overall shot of the site


We are contemplating using a non-penetrating roof mount here


This is a diagram of the layout of equipment in the A/C Pit on the roof, having the uni-strut there will make the installation much faster.


On the other side of the building there is another grouping of A/C units with a sewer stack in the center that we would like to band clamp a light aluminum mast to with a NanoStation2 strapped to it to link a site 3 blocks up obscured by trees.

Friday, April 3, 2009

Simple Command to Search for a Known ESSID

I was looking for a simple way to scan for a specific ESSID and display all of the information about it. So with some help I came up with this.

pyramid:/# iwlist ath1 scan |grep linksys -B1 -A8

Cell 02 - Address: 00:18:F8:EF:XX:XX
ESSID:"linksys"
Mode:Master
Frequency:2.437 GHz (Channel 6)
Quality=23/94 Signal level=-72 dBm Noise level=-95 dBm
Encryption key:on
Bit Rates:1 Mb/s; 2 Mb/s; 5.5 Mb/s; 11 Mb/s; 18 Mb/s
24 Mb/s; 36 Mb/s; 54 Mb/s; 6 Mb/s; 9 Mb/s
12 Mb/s; 48 Mb/s
Extra:bcn_int=100
--
Cell 35 - Address: 00:14:BF:3A:XX:XX
ESSID:"linksys"
Mode:Master
Frequency:2.437 GHz (Channel 6)
Quality=2/94 Signal level=-93 dBm Noise level=-95 dBm
Encryption key:off
Bit Rates:1 Mb/s; 2 Mb/s; 5.5 Mb/s; 11 Mb/s; 18 Mb/s
24 Mb/s; 36 Mb/s; 54 Mb/s; 6 Mb/s; 9 Mb/s
12 Mb/s; 48 Mb/s
Extra:bcn_int=100

Tuesday, March 31, 2009

TWSC Install

So last week we Installed a NanoStation 2 set up as a mesh node. This week we pulled it down and put a Metrix Mark I in its place. We needed a dual radio configuration due to the fact part of the backhaul is ran on 802.11a. After we swapped out equipment we headed down the street to * Art Gallery to install a NanoStation 2.


This is inside the room where the poe adapter and power supply is.


We still have several more NS2's to set up on this block but, for today I am done.

Sunday, March 29, 2009

Access Point Scan from my Living Room

So I am sitting here in my chair killing time and decided to do a access point scan and this is what I came up with:


SSID Type BSSID Channel

NETGEAR BSS 00:22:3f:28:xx:xx 01
PTown BSS 00:1c:df:ac:xx:xx 06
lindel BSS 00:06:25:f3:xx:xx 11
Motorola BSS 00:14:a5:58:xx:xx 09
NEW PHILADELPHI BSS 00:14:a5:98:xx:xx 11
Price Family BSS 00:1a:70:6c:xx:xx 06
belkin54g BSS 00:1c:df:3b:xx:xx 01
linksys BSS 00:14:bf:aa:xx:xx 06
tab488 BSS 00:1e:2a:59:xx:xx 06
wipop528 BSS 00:02:2d:be:xx:xx 01
linksys BSS 00:18:39:b3:xx:xx 06
belkin54g BSS 00:11:50:72:xx:xx 11
oarip BSS 00:0f:66:8e:xx:xx 06
willison BSS 00:02:2d:2f:xx:xx 04
stephon house BSS 00:0f:66:19:xx:xx 07
joanne BSS 00:1c:10:4d:xx:xx 06


Better than half of them are unsecured and I would say at least 3 have the default password still enabled. Only 2 of these listed are mine and they both are secure in one way or another.

Saturday, March 28, 2009

OpenWRT on the NanoStation 2 : Part 2

On Thursday I posted the first part of installing OpenWRT on a Ubiquiti NanoStation 2. Now I will be showing how to configure the unit with a Master and adhoc VAP With OLSRD running on the adhoc VAP. I found it was easier to configure the NS2 via the CLI than the Web Interface, but that is my preference.

root@OpenWrt:~# cat /etc/config/wireless

config 'wifi-device' 'wifi0'
option 'type' 'atheros'
option 'maxassoc' ''
option 'distance' ''
option 'diversity' ''
option 'txantenna' ''
option 'rxantenna' ''
option 'disabled' '0'
option 'antenna' 'external'
option 'country' '0'
option 'channel' '01'
option 'hwmode' '11bg'

config 'wifi-iface'
option 'device' 'wifi0'
option 'encryption' 'none'
option 'bssid' ''
option 'server' ''
option 'port' ''
option 'hidden' '0'
option 'isolate' '0'
option 'bgscan' '0'
option 'frag' ''
option 'rts' ''
option 'wds' '0'
option 'key1' ''
option 'key2' ''
option 'key3' ''
option 'key4' ''
option '80211h' ''
option 'compression' ''
option 'bursting' ''
option 'ff' ''
option 'wmm' ''
option 'xr' ''
option 'ar' ''
option 'turbo' ''
option 'macpolicy' 'none'
option 'maclist' ''
option 'ssid' '****06'
option 'mode' 'ap'
option 'txpower' '16'
option 'network' 'lan'

config 'wifi-iface'
option 'device' 'wifi0'
option 'hidden' '0'
option 'encryption' 'none'
option 'ssid' '****mesh'
option 'bssid' ''
option 'mode' 'adhoc'
option 'server' ''
option 'port' ''
option 'isolate' '0'
option 'bgscan' '0'
option 'frag' ''
option 'rts' ''
option 'wds' '0'
option 'key1' ''
option 'key2' ''
option 'key3' ''
option 'key4' ''
option '80211h' ''
option 'compression' ''
option 'bursting' ''
option 'ff' ''
option 'wmm' ''
option 'xr' ''
option 'ar' ''
option 'turbo' ''
option 'macpolicy' 'none'
option 'maclist' ''
option 'txpower' '16'
option 'network' 'ath1'


root@OpenWrt:~# cat /etc/config/network

config 'interface' 'loopback'
option 'ifname' 'lo'
option 'proto' 'static'
option 'ipaddr' '127.0.0.1'
option 'netmask' '255.0.0.0'

config 'interface' 'lan'
option 'proto' 'static'
option 'macaddr' ''
option 'ip6addr' ''
option 'netmask' '255.255.255.0'
option 'gateway' ''
option 'ip6gw' ''
option 'dns' ''
option 'ifname' 'eth0'
option 'ipaddr' '10.0.5.1'
option 'type' 'bridge'

config 'interface' 'ath1'
option 'macaddr' ''
option 'ip6addr' ''
option 'gateway' ''
option 'ip6gw' ''
option 'dns' ''
option 'proto' 'static'
option 'ipaddr' '10.0.0.6'
option 'netmask' '255.255.255.0'

root@OpenWrt:~# cat /etc/config/dhcp

config 'dnsmasq'
option 'domainneeded' '1'
option 'boguspriv' '1'
option 'filterwin2k' '0'
option 'localise_queries' '1'
option 'local' '/lan/'
option 'domain' 'lan'
option 'expandhosts' '1'
option 'nonegcache' '0'
option 'authoritative' '1'
option 'readethers' '1'
option 'leasefile' '/tmp/dhcp.leases'
option 'resolvfile' '/tmp/resolv.conf.auto'

config 'dhcp' 'lan'
option 'interface' 'lan'
option 'start' '100'
option 'limit' '150'
option 'leasetime' '720m'
option 'ignore' '0'

config 'dhcp' 'wan'
option 'interface' 'wan'
option 'ignore' '1'
option 'start' ''
option 'limit' ''
option 'leasetime' ''

config 'dhcp'
option 'interface' 'ath1'
option 'ignore' '0'
option 'start' '100'
option 'limit' '100'
option 'leasetime' '400m'


Next time I will explain how I installed OLSRD and configured it

Thursday, March 26, 2009

NanoStation 2 Install


So here is part of the Install that I did on Tuesday. We purchased a Chimney strap mount from Radio Shack and Steve had found some 2" EMT Conduit along the side of the road which made a great mast. We ended up cutting off 3' for a mast length of 7'.


We used the Cable Ties that came with the NS2 to attach it to the mast and for the Omni we used a couple wire ties and a stainless hose clamp which was pretty secure.

OpenWRT on the NanoStation 2

I am in the process of setting up a mesh network in Tremont Ohio which is part of Cleveland. So this past Tuesday I installed OpenWRT on some NanoStation 2's. I followed Integer Overflow's Instructions on how to install OpenWRT on the NS2. The client wanted a Graphical UI so I installed X-WRT on the device. I did the following to accomplish this, first I had to change the ip address to match the subnet the NS was attached to.

root@OpenWrt:~# ifconfig br-lan 192.168.1.4


Then I had to configure opkg so that OpenWRT could be updated and X-Wrt installed
root@OpenWrt:~#  echo "src X-Wrt http://downloads.x-wrt.org/xwrt/kamikaze/8.09/atheros/packages"
root@OpenWrt:~# opkg update

root@OpenWrt:~# opkg remove -recursive luci-*

root@OpenWrt:~# opkg update
root@OpenWrt:~# opkg install webif


Now the NS2 is runing OpenWRT with the X-Wrt UI, time to start configuring. I will show how to do this in my next post.